Week 15- Liquid Nitrogen Ice Cream
05/20/13

Week 12- Fruit Caviar
04/29/13
This week we created apple fruit caviar and mango ravioli through the process of spherification and reverse spherification. we could have also used other flavors, but we chose to use mango and apple. We created this mixture with sodium alginate to the apple juice and sugar. This allows it to form spheres when put into the calcium bath. We also added in sodium citrate to the apple juice. This allows it to form spheres better. We then put it into the fridge to use tomorrow. The next day, we created our calcium bath by adding water and calcium chloride. We then tried transfering the apple juice mixture to pipets to drop spheres into the bath. We couldn't do this well because it was too gelatiny. We heated it up to get it more of a fluid structure. We then created our spheres successfully with the pipet and with pipets without the tip. After a few minutes in the bath, we removed it and tasted it. We tasted it, and it was very watered down. So, the next day, we boiled it down to remove some of the water to try and concentrate it more. This worked a little bit, but was still not sweet enough for our taste, so we put in some more sugar. This finally worked and they tasted pretty good. We also made mango raviolis in this process of reverse spherification. For this we again used sodium alginate, but instead this time we used it as the bath. We made our mango mixture to use afterwards. We first used spoons to try and get the ravioli shape. This did not work very well, so we decided to cups and freeze a small amount in the freezer. We did this, and got the shapes out, then we let it thaw a little. Next, we placed it into the sodium. We let this sit for roughly 5-10 minutes. They came out fairly well, they were too large however. They slowly thawed inside their sodium gel shell. After they were stiff enough to handle, we scooped them out. They weren't strong enough to hold, and broke when we removed them.This was a good experience for us, and we learned what we could do to improve, concentrate the sodium more, add more calcium to the mango, and keep the amount in the cup smaller. We would have implemented these new techniques, but we unfortunately did not have enough time.
Week 11(pt2)-Sous Vide Style Steak
04/22/13
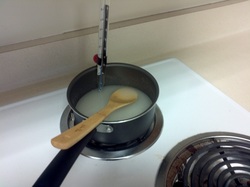
The second half of this week, we sous vide cooked steak. We had just finished learning about the process of sous vide cooking and had already cooked the salmon. We started by choosing a piece of the steak. We then prepared it by rubbing salt into it. We could have also used different seasonings and flavors, but there wasn't any available to us, so we did not use any. So after we applied our salting, a little too much for my taste unfortunately, we sealed it into a ziploc bag and removed the air. We used the same method as we did for the salmon, and we dropped it into cold water and the water pressure was pushed down on the bag and pushed the air out of the bag, leaving as little air as possible. Then we put it into the bag at the end of class wednesday. On thursday, we can came in, we immediately got working. We first started by heating water on the stove. For the sous vide steak, we decided not to use the sink, but to use a pot of 145 degree water on the stove. We did this because the steak required a higher temperature than the salmon, and it was easier to control on the stove. We controlled it by the use of the verner lab pro's temperature probe. Using this, we were able to constantly measure the temperature of the water to keep it at our desired temperature. After about 25 minutes, we removed our steak from the water. We took it out of the bag and placed it on a pan to torch. We used the butance torches and used the mallaird reaction to brown the outsides and edges of the steak. the mallaird reaction is when the outside of the steak carmalizes to give it a great appearance, taste, and texture. Finally we divided the peices evenly, and enjoyed our wonderful sous vide style, 2 time michelin star winning, steak, with a1 steak sauce.
Week 11(Pt1)- Sous Vide Style Salmon
04/22/13
This week, we cooked salmon, sous vide style. Now, a lot of people probably have no idea what sous vide is, i sure didnt when we first started. I didn't even know how it was pronounced. Well, to answer that, it's pronounced soos veed. It is a very simple process of cooking using not the the temperature, but the energy. This process involves using a lukewarm, 120 degree water bath to produce energy that will slowly cook the food. We use water, because water has to ability to hold a lot more energy than air. This allows it to be constant at a temperature for longer periods of time, only needing to be reheated occasionally. We use this process and place the food that we want cooked, salmon, in a plastic bag with some ingrediants that add flavor. We used butter and lemon juice, and we tried to get as much air out of the bag possible. A technique we used to do this was by having cold water, and placing the bag and its contents inside. The cold water causes the excess air to be pushed out of the bag, and then we could seal it with as little air as possible. Next, we boiled water and used hot water from the sink. We filled the sink with enough water, and placed the salmon in. We continuosly monitored the temperature, and adjusted it accordingly with the boiling water. This allows the water to stay at our desired temperature for cooking sous vide, and makes it so it is not overcooked. We did this for about 20 minutes until the salmon become completely opaque. This meant it was cooked all the way through. Finally, we took it out of the bag and used the torch on it. Using this torch, we seared the outside and the edges. This allows it to be heated and finishes the outside so it tastes better. And then, we enjoyed our delicious sous vide style salmon with condiments such as honey mustard, a1 steak sauce, and tartar sauce, which I personally enjoyed the most.
Week 8-Homemade Marshmallow Peeps
|
Week 7- Creme Brulee
03/11/13

At the end of this week, as a continuation of our learning of vanilla, we created crème brulees. A crème brulee is a delicious crème and egg custard like substance covered in a slightly burnt hard crust of caramel. We made this through a three day process. First, we boiled the crème with vanilla. Then, we added this to a mixture of egg yolks with vanilla sugar. The vanilla sugar is sugar that has been infused with the flavor of vanilla. We slowly poured and whisked the two together, and then we poured them into the ramekins. After this, we placed the ramekins into the refrigerator to cool for the next day. For the next day, what we did was we put them in the oven to cook. We cooked them at 325 degrees in the oven for around 40 minutes. After this, Mr. Hitchens took them out and put them in the fridge to cool again. Finally, the third and final day, we had the most fun. We learned how to use the butane lighter to burn and to caramelize the sugar that we sprinkled on top of the crème brulee. This created a hard, sugary crust that made the crème brulee excellent. It made the perfect complement to the soft, firm, vanilla sugar egg yolk custard. Then, we got to eat the delicious crème brulee. In the video we watched with Alton Brown, he showed us that are we caramelized the sugar correctly, and we let it harden up enough, it should have a distinct sound when a spoon is put in it. He showed us how there was supposed to be a 'crack' sound when we stuck it in. Below, you will hear a clip of me putting the spoon into the crème brulee.
| week_7_creme_brulee_crack.mov |
Week 6 - Vanilla Extract
03/04/13
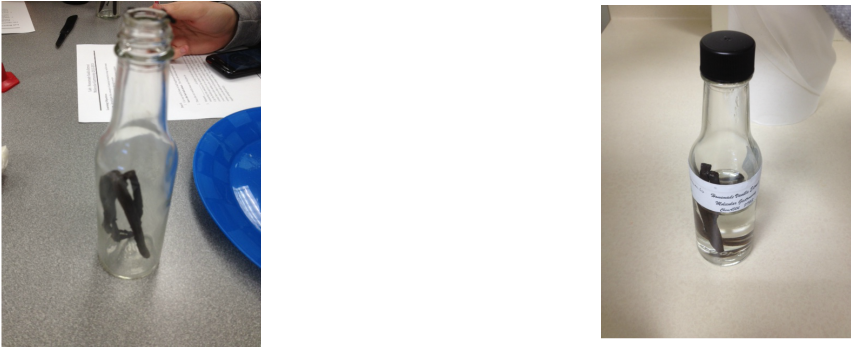
This week, we learned about vanilla and the strucutre and chemical of vanilla. We also watched videos explaining the creation and origin on the vanilla bean. This video also taught us how to create vanilla extract. Basically, what we did was we got the materials ready. We first cut the bean in two down the middle, leaving it slight attached with around 1 inch left. Then we folded in half and put it into the bottle. We calculated how much of the ethyl hydroxide we should add, and that came out to be around 75ml of ethyl hydroxide. We poured that in the bottle and sealed and labeled it. Then we took them home, and we will be able to use them in about 8 weeks. Vanilla is a complex structure from the chemical vanillin. It has many places around the world that it is able to grow. We used vanilla beans from Madagascar. Vanilla beans and ethyl hydroxide together are cheaper than buying premade vanilla extract. So, it is cheaper to make your own vanilla extract versus buying store made vanilla extract. So, just 8 more weeks, then i will be able to enjoy the occasional baking with my delicious homemade vanilla extract.
Week 5 - The Mock Apple Pie
02/25/2013
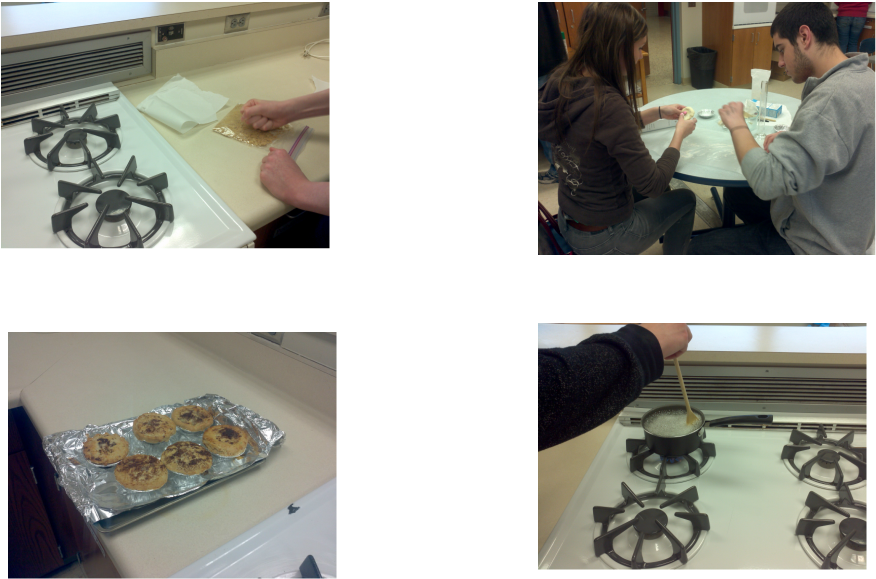
For this week, we learned about other ways to make pie. Particularly, we learned about how to make mock apple pies. To do this, we first started out by watching a video on the procedure. Then we learned from 2 articles that we had to read. The following day, we prepared our materials. We prepared them by creating pie crust. We created the pie crust with jiffy's pie crust. we each created it and put it into our small aluminum pie container. We also made tops for the pie. The next day, we created the syrup and smashed the graham crackers. The syrup consisted of sugar, cream of tartar, water, and lemon. We heated it with sugar, cream of tartar, and water. We heated it until it boiled, then we added in the lemon juice on lower heat. We did this until there was around 1 1/2 cups of syrup. We let this sit in the fridge overnight. Then, we smashed around 2 ounces of crackers and stored them away. The next day, we preheated the ovens to 425 degrees. Then we took out our pie crusts, and we put the smashed graham crackers in with the syrup. Then, we covered the pie with the top of the crust, and fluted the edges. Then, we placed some butter on top with cinnamon, after we cut the top of the crust to allow hot air to escape. Next, we placed our pies in and waited for around 25-30 minutes. Finally, we enjoyed our delicious, hot, mock apple pie.
Week 4 - The Miracle Berry
02/18/2013
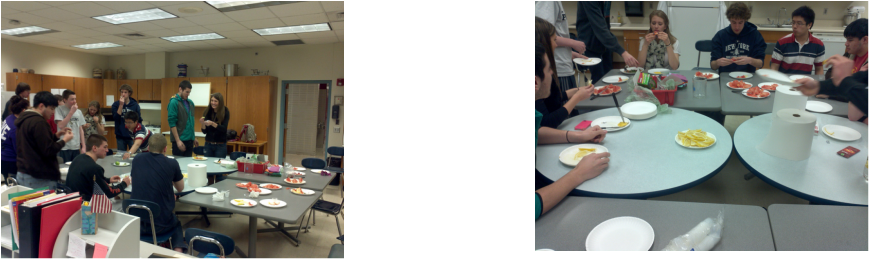
This week, we had the oppurtunity to test out the power of the magical miracle berry. They are tiny berries found from the synsepalum dulcificum. They contain miraculin, which is also used as a sugar substitute. It bonds to the sweet receptors on taste buds and change when their pH is changed. This creates sour foods that taste sweet. We each got a tablet pill that had the contents of miracle berry extract. Each of us held these in our mouths for roughly 2 minutes. Afterwards, we tested different foods, strawberries, tomatoes, grapefruit, lemons, limes, yogurt, sour cream, tonic water, vinegar, and pickles. Every different food we had we prepared by cutting them into bite size pieces. They each resulted in a different effect. The lemon, grapefruit, lime, and strawberry had the greatest difference for me, while the vinegar, pickle, and the rest did not have as great of an effect. We did this for majority of the period, but the effects of the miracle berry last for only about an hour.
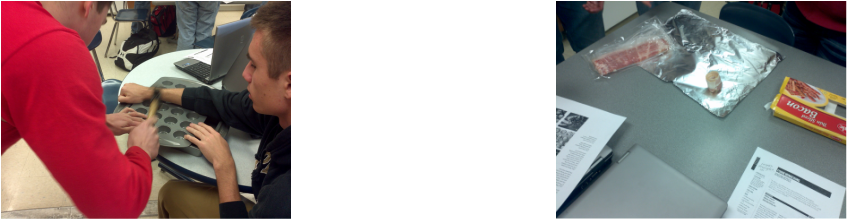
Week 3- Form Mimicking: Bacon Roses for V-Day
02/11/2013
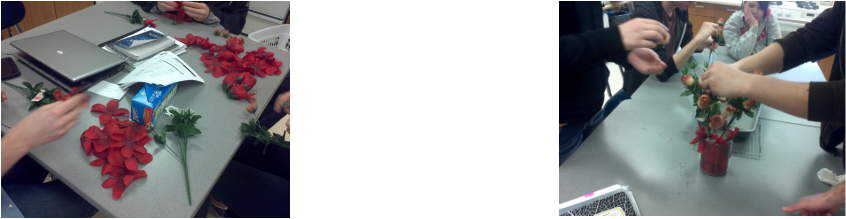
Valentine's Day was on thursday the 14th. In celebration of this, we created a wonderful creation containing two great things, bacon and roses. We created bouquets made of bacon instaed of roses. To do this, we started by preparing our materials. We used thick and thin cuts of bacon and fake roses. We rolled the bacon up and baked it in the oven. While doing this, we also unstemmed the rose petals from their stems and prepared the cupcake holder by punching holes. After the bacon was ready, we inserted the bacon onto the stems of the roses. At the end, we ended up with a beautiful bouquet of bacon.
Week 2- Flavor Project
02/04/2013
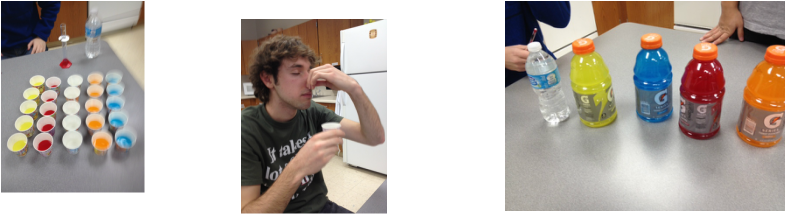
This week, we designed our own experiment on how smell affects taste. We created a procedure for a lab where the test subject does two experiments. One experiment, they must taste different types of gatorade, orange, fruit punch, cool blue, lemon lime, and water, and they must distinguish the difference. Following this, they did the same thing, excpet this time with their nose closed. After this, we compiled our results and made a conclusion that smell has a significant impact on the ability to taste.
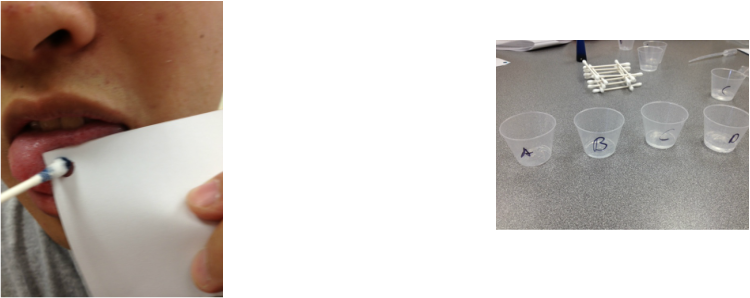
Week 1
01/29/2013
Week 1 we started learning about flavors and the mapping of the tongue. We did a lab, Sensory Analysis: Gustation. In this lab, we experimented with different tastes, sour, sweet, bitter, or salty, in different regions of the tongue. Doing this, we learned the sensitive areas of the tongue that can sense varieties of flavors. Also, we used blue food dye on a cotton swab to apply it to a 7mm area on our tongues to count the amount of papillae present. The papillae are tiny dots located throughout the tongue, most of which contain taste buds that can taste specific flavors.